3 min read
Auth Series #6 - Secure Open API (Swagger) calls with Microsoft Entra ID/Azure AD
Auth Series #6 - Secure Open API (Swagger) calls with Microsoft Entra ID/Azure AD This is the 6th tutorial of the Auth Series. Previously in the...
4 min read
Mirza Ghulam Rasyid : Dec 8, 2023 1:32:00 PM
This is the 2nd tutorial of the Auth Series. In this tutorial, we’ll create a basic ASP.NET Core Web Api and protect it using Azure AD/Microsoft Entra ID. If you want to know how to protect web app with Azure AD/Microsoft Entra ID, you can checkout our previous tutorial: Auth Series #1 - Azure Entra Id Authentication using ASP.NET Core MVC
Requirements:
- Web Framework: ASP.NET Core 7x Api Default Project
- Nuget: Microsoft.Identity.Web
We are going to make a simple WeatherForecast Api and protect it using JWT Bearer/Oauth via Microsoft Entra ID / Azure ID and we will then call the api endpoint via Postman.
Before we move further, let’s start with the first step.
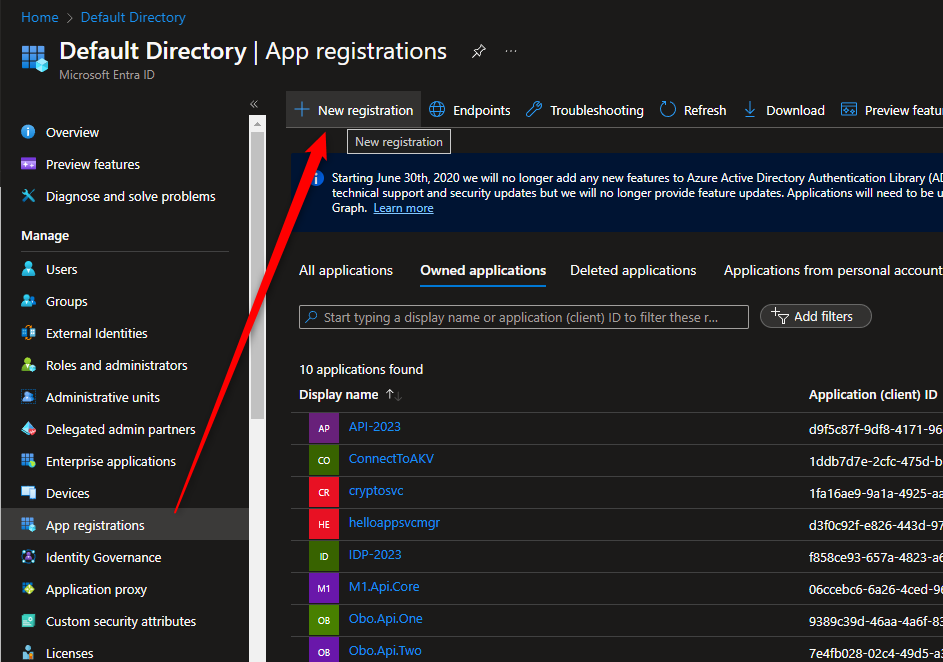
We need to create an api registration in the Azure Portal so that we can protect our api. First, we need to go to Microsoft Entra ID Portal > App Registrations > New registration.
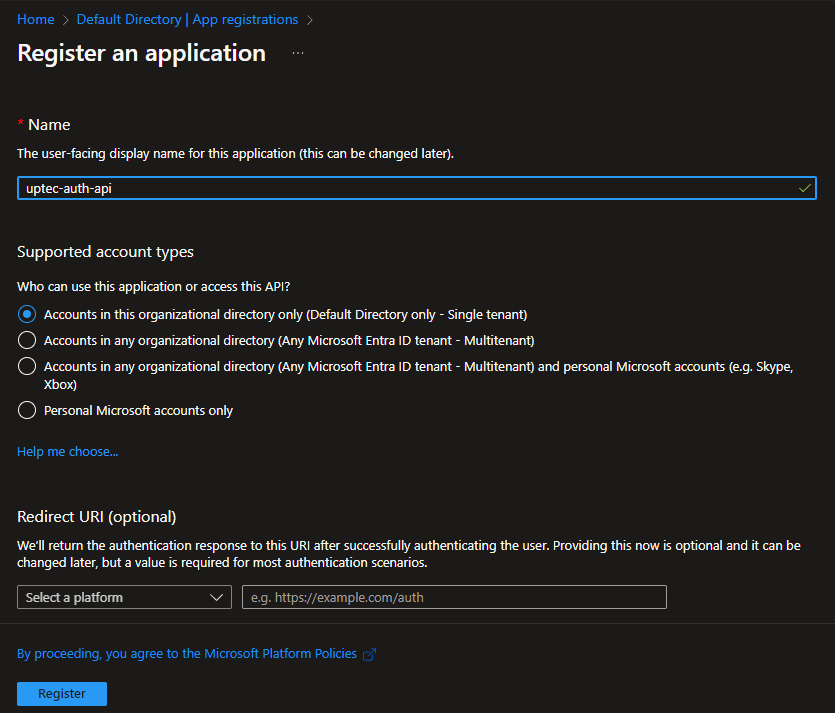
In this tutorial, we will use uptec-auth-api as the name but you can use any name you want. Leave other options as is and click Register.
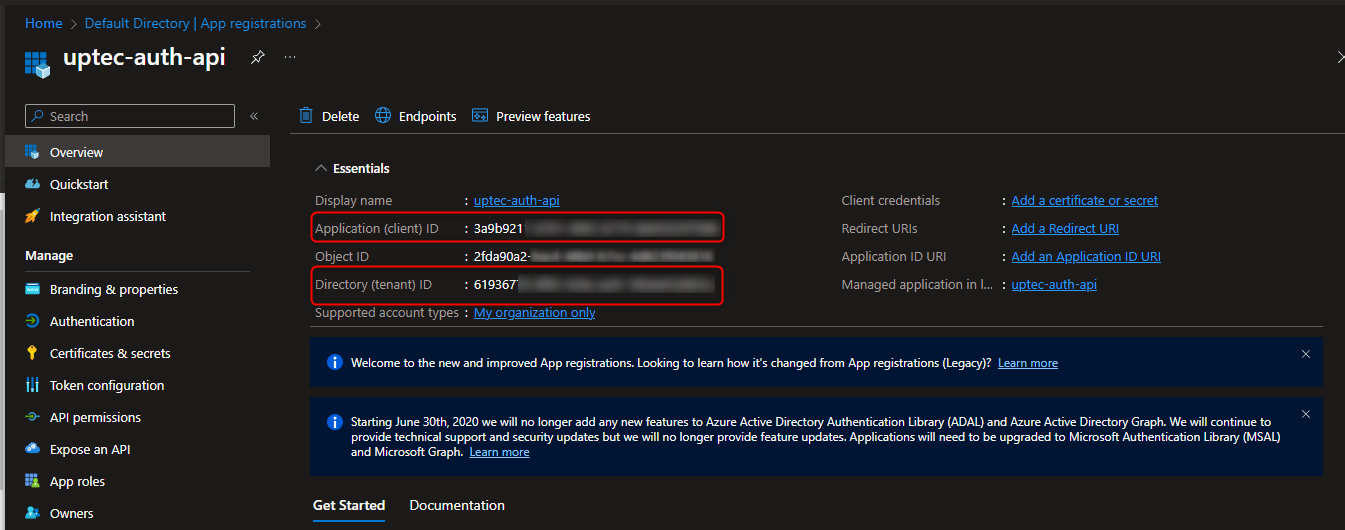
After it has been created, you should take a note of the Client Id and Tenant Id for our api appsettings.json.
Now, go to Expose an API > Add Application ID URI and Add a scope. Application ID URI is important as an identifier for our authorisation scope later. And the scope itself is like an attribute that we can use to protect an api as part of authorization. It means that, after an api gets validated (JWT Token validated), we can check its scope in the JWT token as well. If it has the same scopes that we’ve registered, the request can be continued. Otherwise, the request can be stopped and 403-forbidden will be issued.
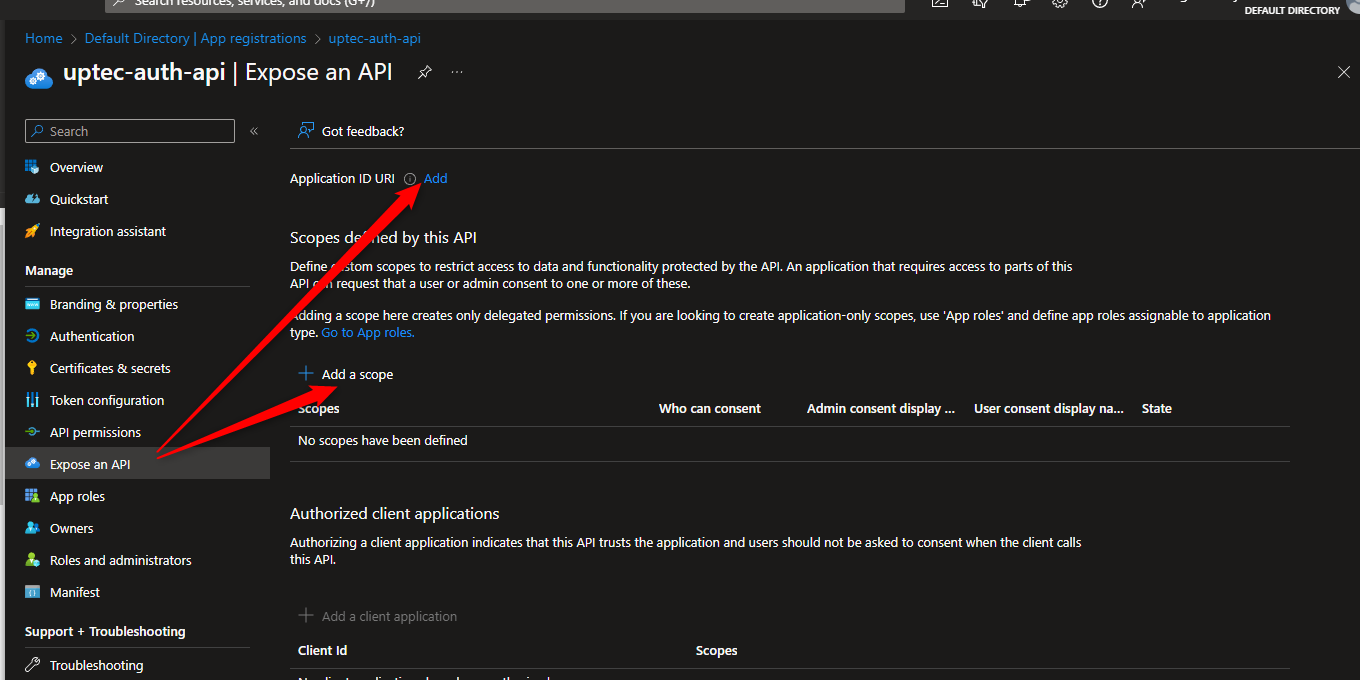
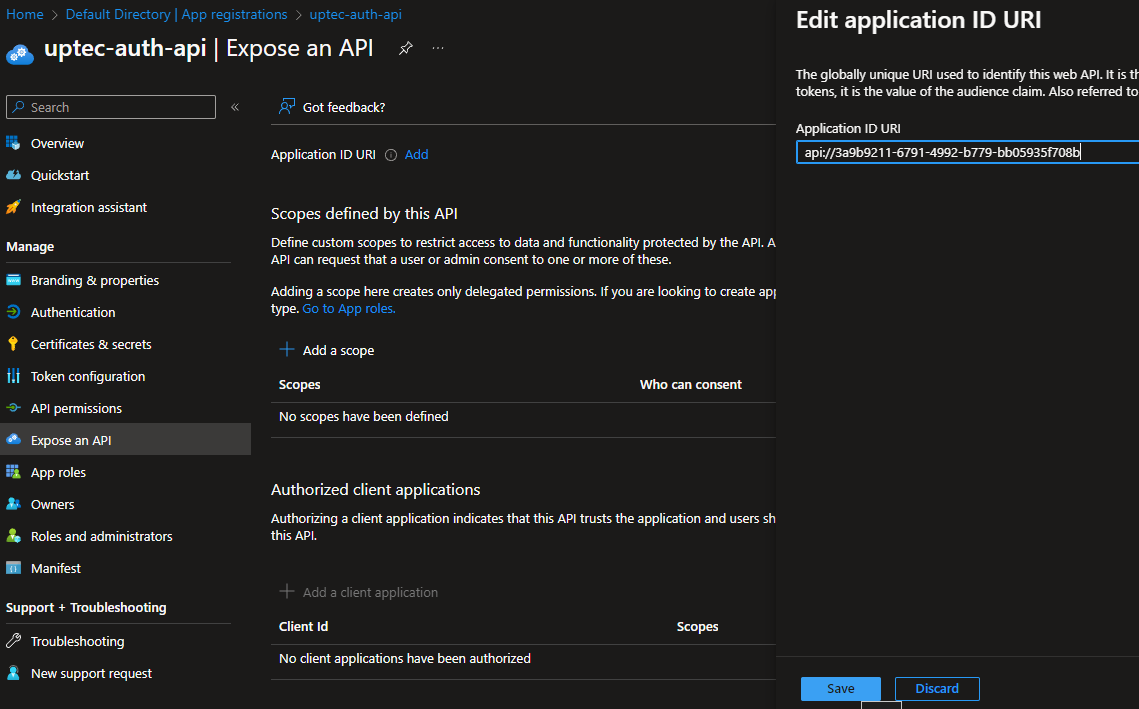
Add the Application ID URI like the image below.
After that, add a new scope, give it a name -> Access.Read and fill the other information like Title and Description like in the screenshot below.
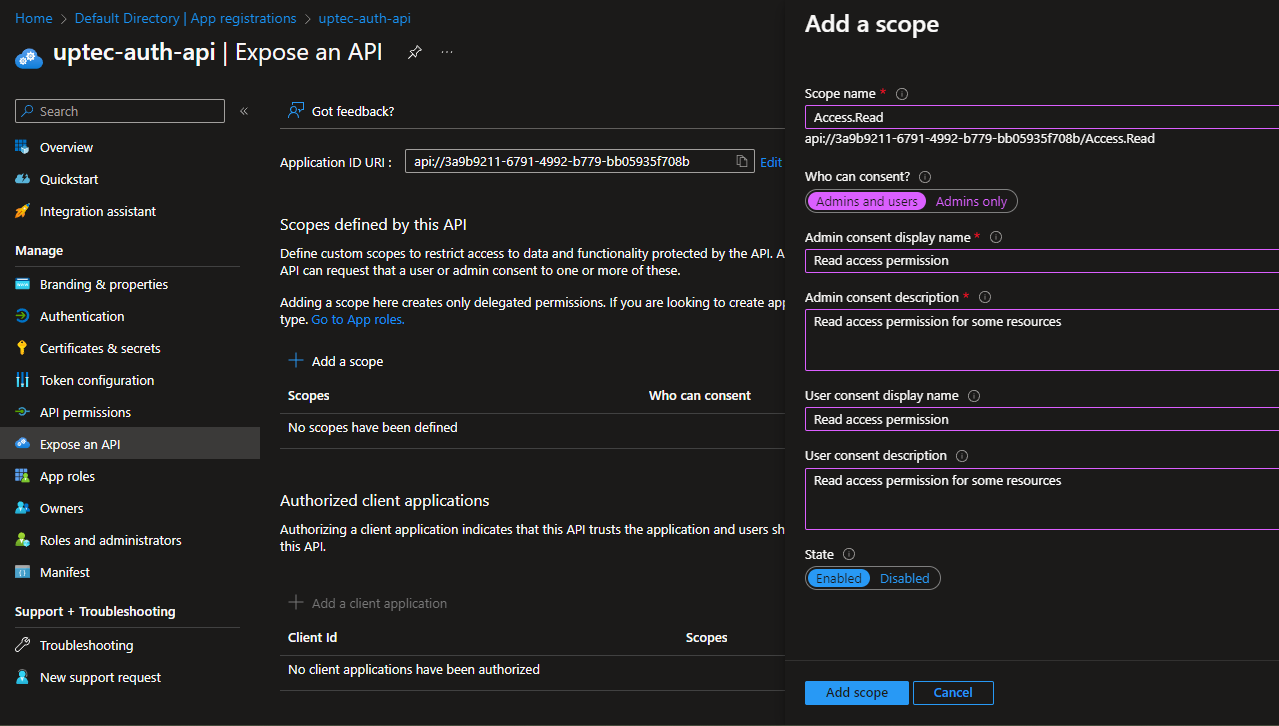
Once created, don’t forget to copy/take a note of the scope for later use.
Now, we are will create an ASP.NET Core Web API project. In this section, I will use .NET 7.
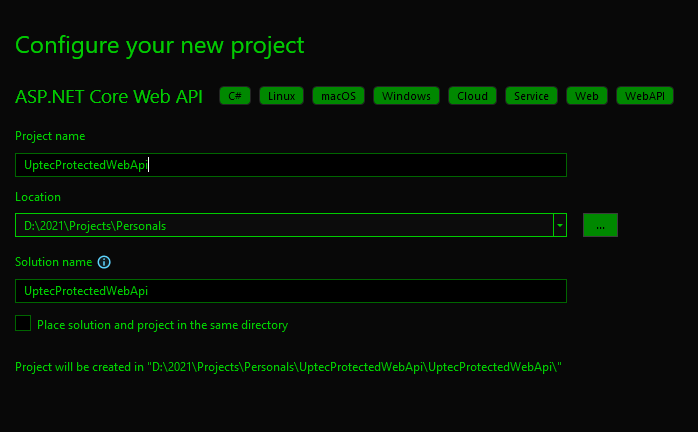
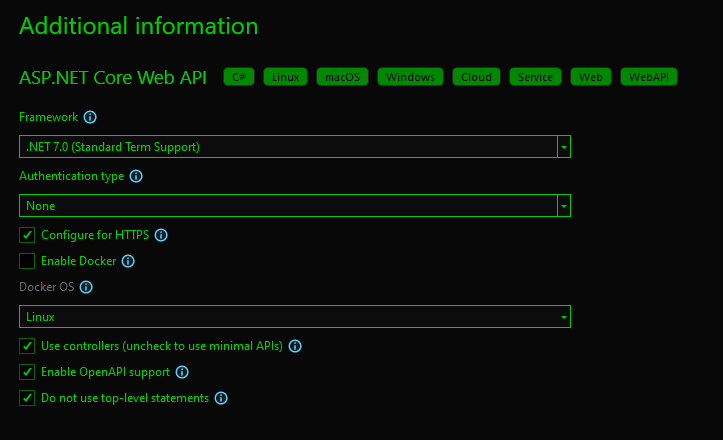
Open Visual Studio, Select ASP.NET Core Web API project. Give it a name, and make sure to leave other options as per screenshots below.
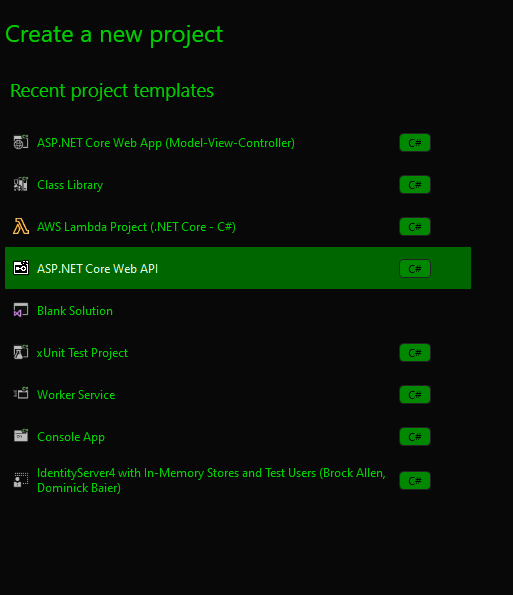
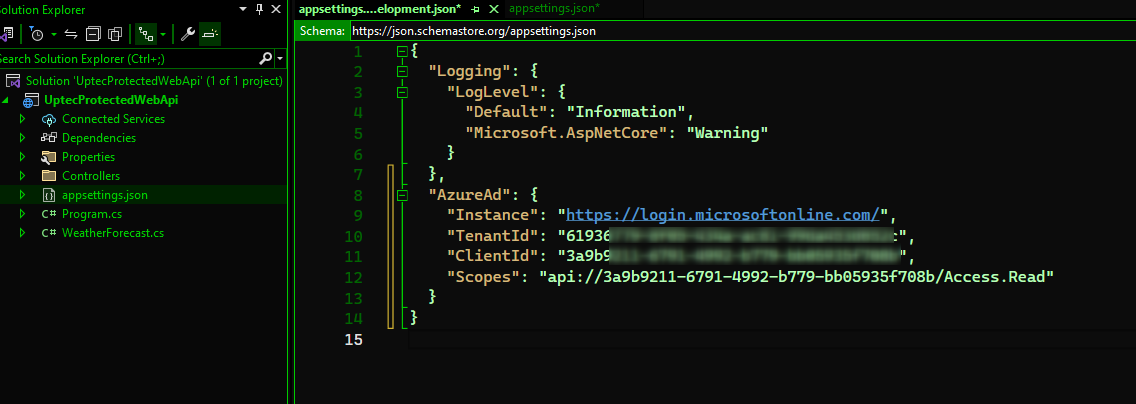
Once the project is initialised, modify the appsettings.json and add the below section.
"AzureAd": {
    "Instance": "https://login.microsoftonline.com/",
    "TenantId": "",
    "ClientId": "",
    "Scopes": "api://<GUID>/Access.Read"
  }
Make sure you copy past the TenantId, ClientId and Scope from our previous #1 section.
Install the nuget package:
Microsoft.Identity.Web
This library is used to enable JWT Bearer/API Protection using token in our api project.

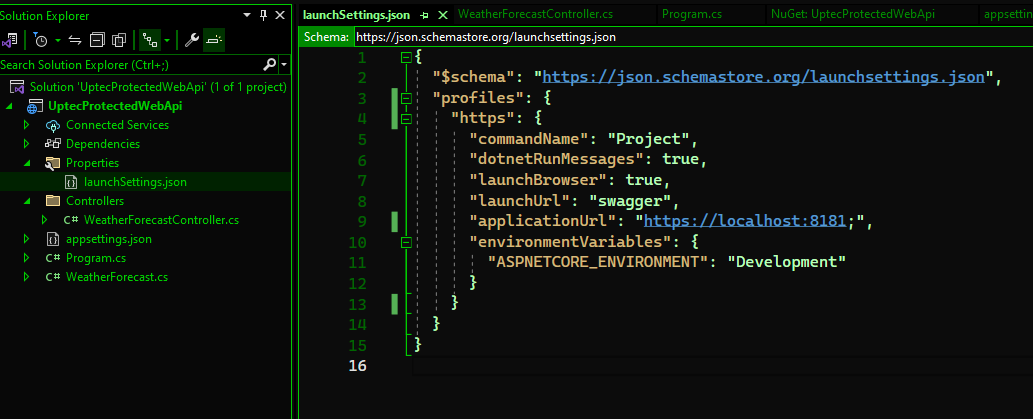
To customize the program execution, we need to modify our launchSettings.json. Cleanup everything and leave the “https” section with default port 8181.
{
  "$schema": "https://json.schemastore.org/launchsettings.json",
  "profiles": {
    "https": {
      "commandName": "Project",
      "dotnetRunMessages": true,
      "launchBrowser": true,
      "launchUrl": "swagger",
      "applicationUrl": "https://localhost:8181;",
      "environmentVariables": {
        "ASPNETCORE_ENVIRONMENT": "Development"
      }
    }
  }
}
Once the above setup is completed, we will enable the api protection by customising the Program.cs file. Add the following namespace:
using Microsoft.Identity.Web;
Then add the following code to register the MicrosoftIdentityWebApiAuthentication to enable api authentication/protection using JWT Token from Microsoft Entra ID/Azure AD.
services
    .AddMicrosoftIdentityWebApiAuthentication(configuration, "AzureAd");
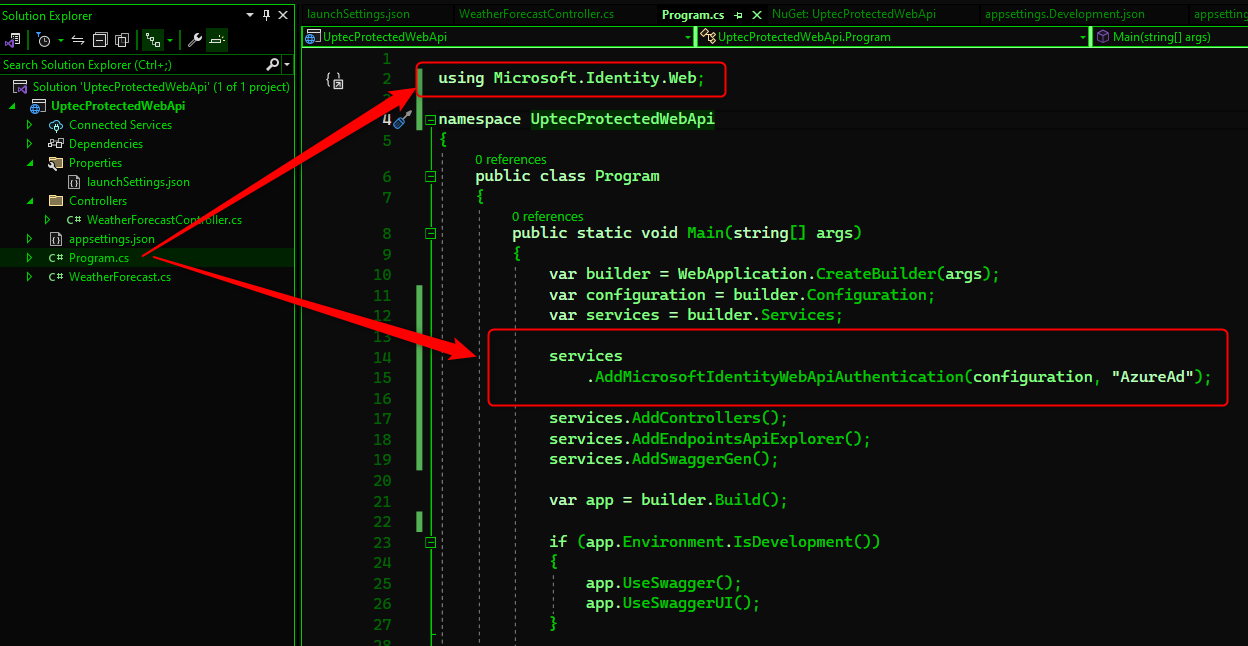
The above snippet will read our configuration section of AzureAd in appsettings.json file.
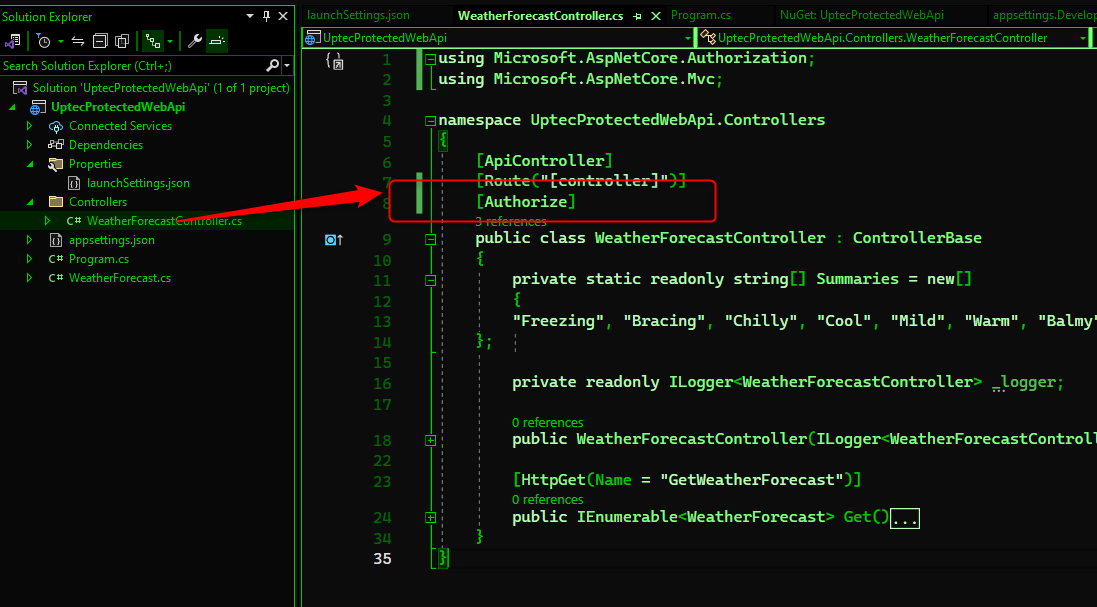
The last step is to mark our controller as Authorized. It means, only authenticated members are allowed to access the endpoint.
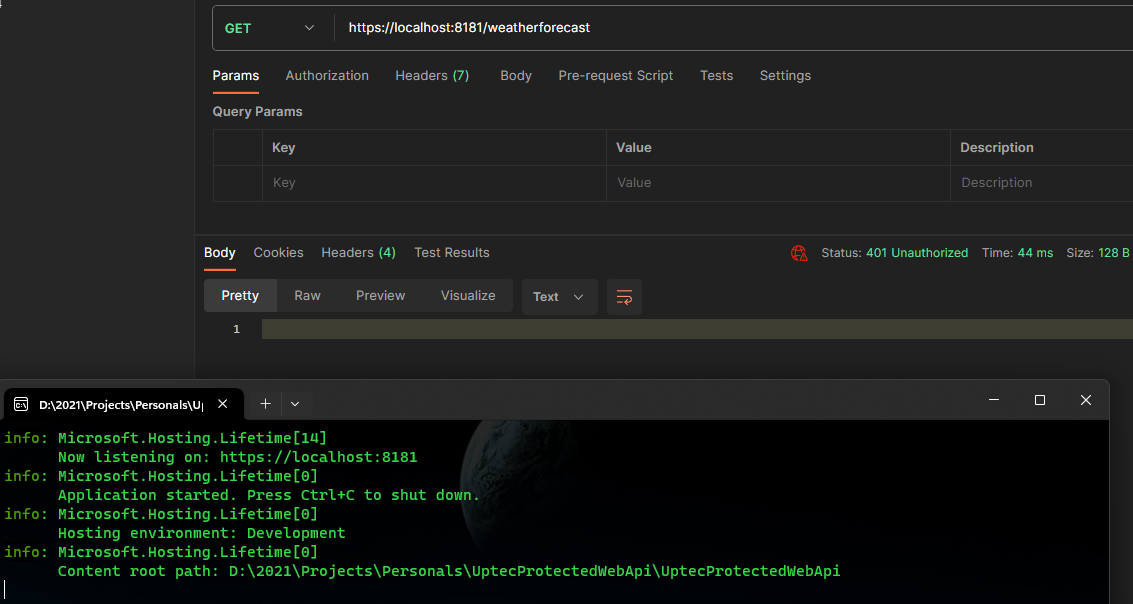
Now we will test the app using Postman. And because we are not authenticated, of course we’ll get 401.

Ok, because we got 401, we need our Postman to be authenticated to access the endpoint. To do this we will create new App Registration specially for any clients that will access any protected apis that we define.
Give the name anything but ended with -caller (optional - previous app registration was uptect-auth-api).
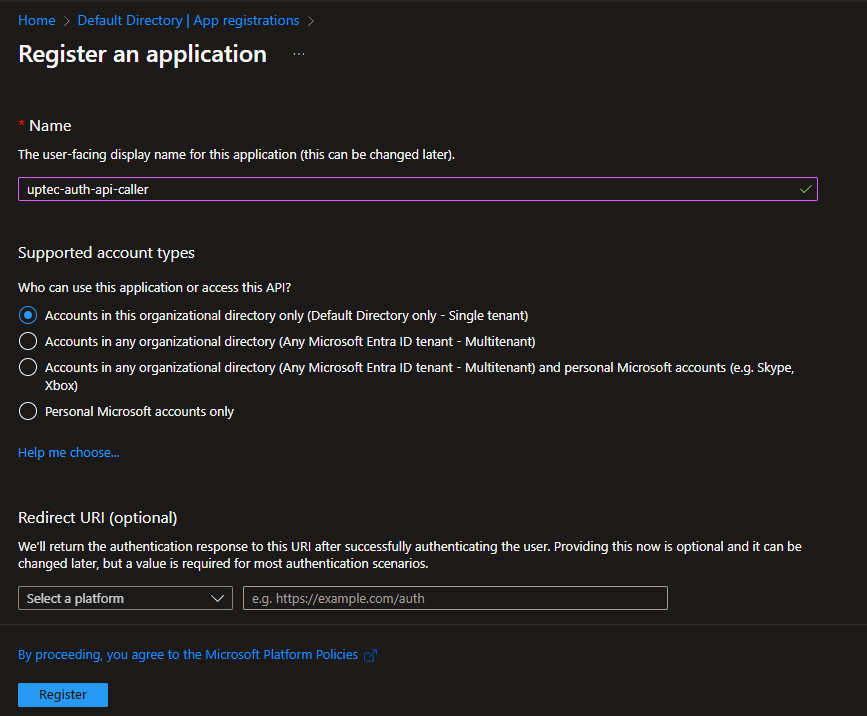
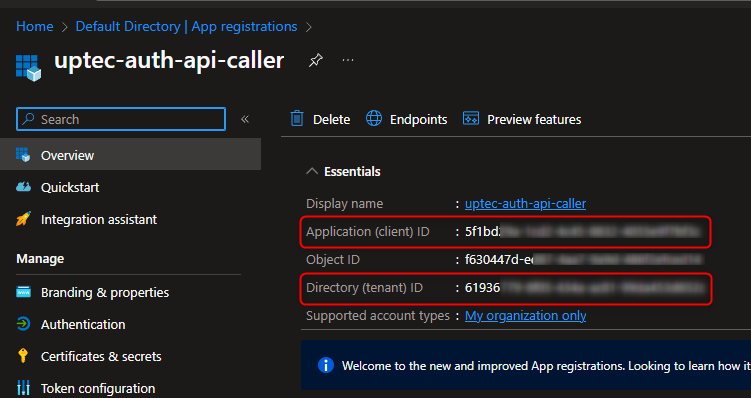
Once created, take a note on those client id and tenant id.
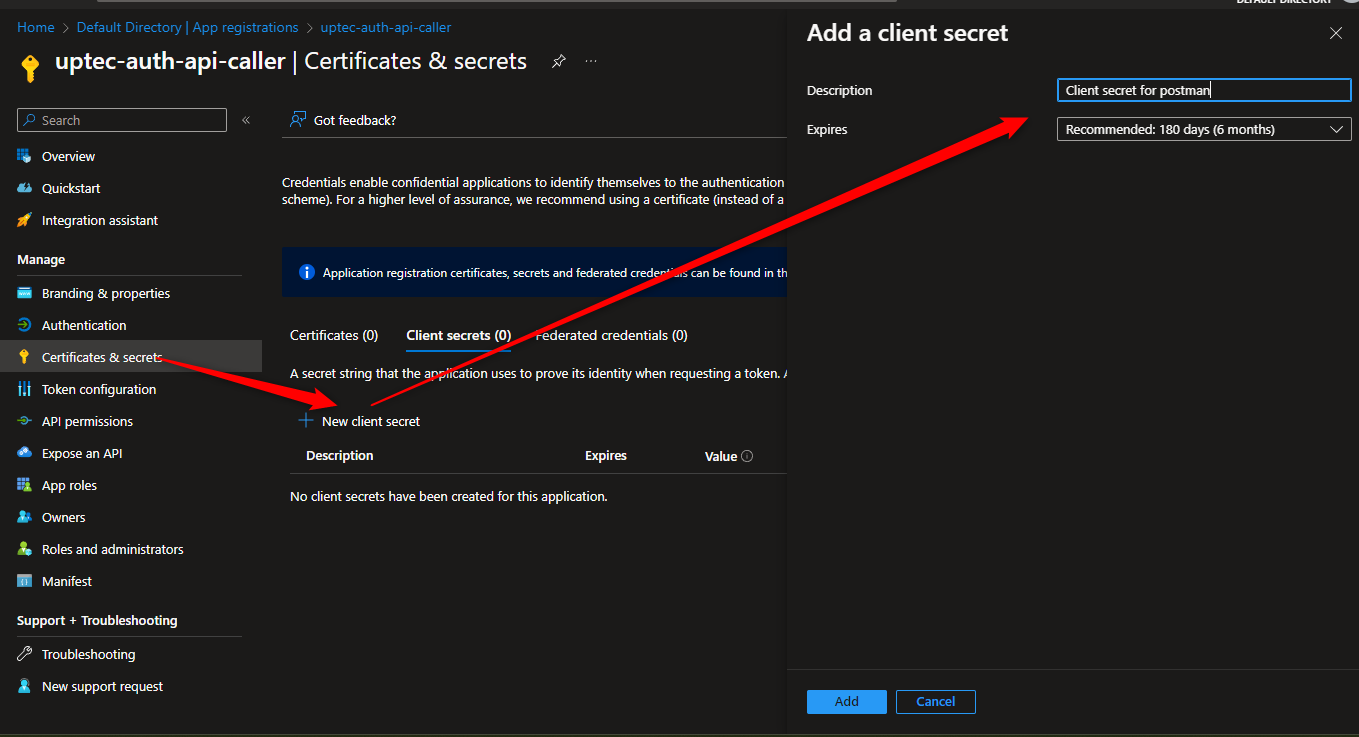
Create the client secret and take a note of it in Certificate & secrets menu.

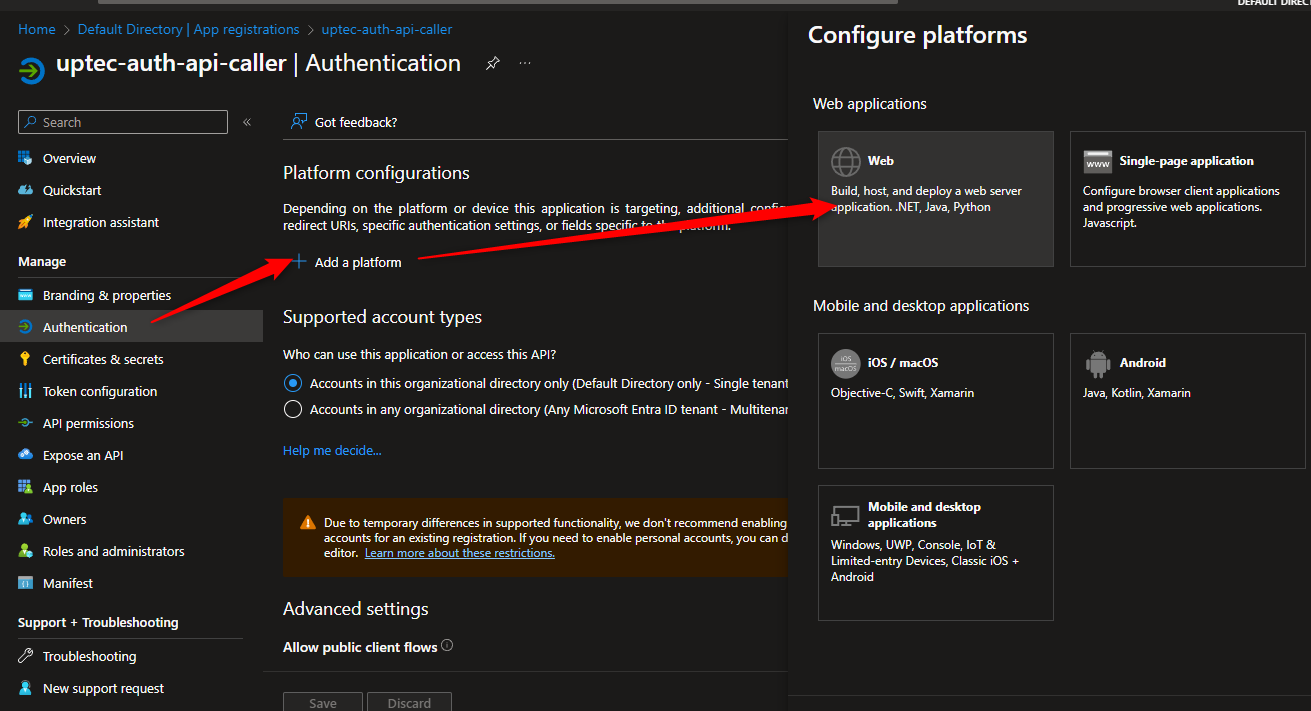
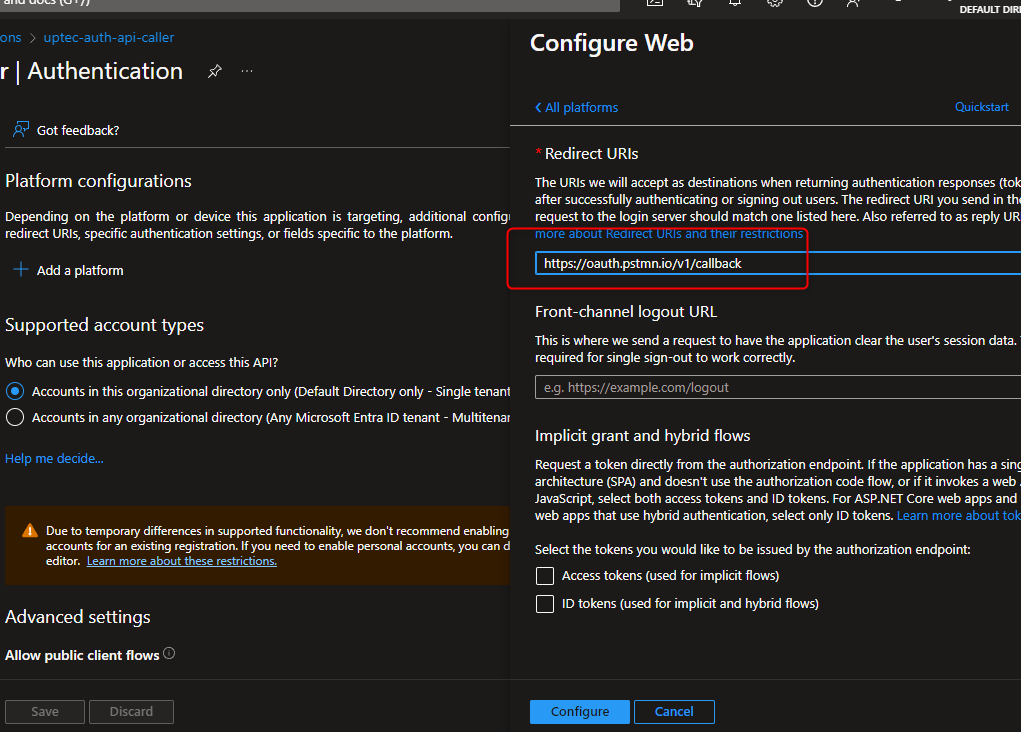
For Postman to work, we need to register the callback url in the Authentication menu. Paste the below url:
https://oauth.pstmn.io/v1/callback
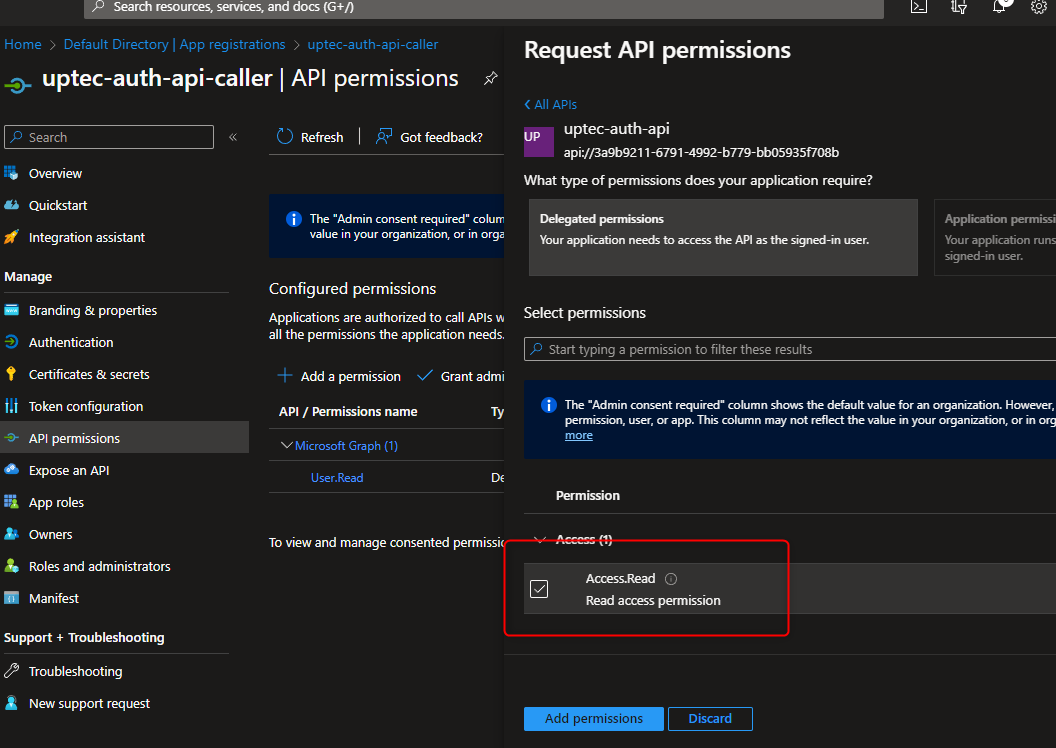
After we have defined our callback url, we need to make sure our Postman’s app registration can easily access our Protected Api’s app registration. We need to request api permissions for our api’s scope we defined earlier in the beginning. Go to API Permissions menu, select Add a permission button, in the APIs my organization uses type your previous api’s app registration name and select it.
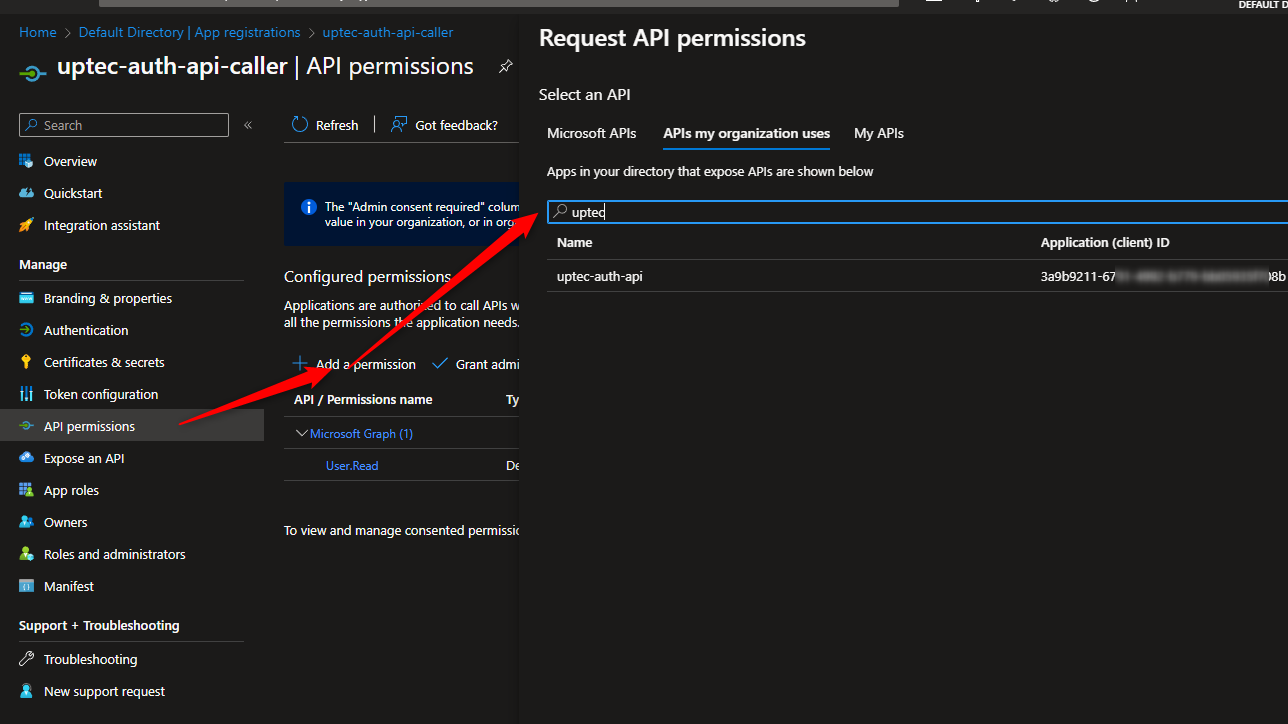
Once selected, choose the permission that we defined earlier.
Access.Read
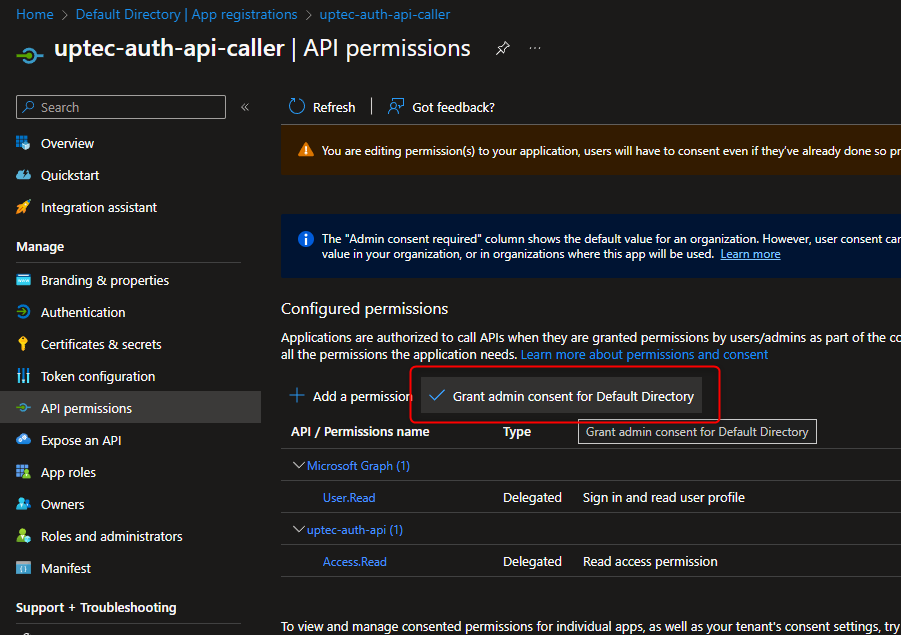
The last step is to grant admin consent for requested api’s scope(s).
After step #6 is completed, we can now access the api with Postman. To do so, we need to collect the OAuth v2 authorization and token endpoints from our api’s app registration.
Take a note of both the OAuth v2 authorization and token endpoints like the image below:
NB: This is api’s app registration not Postman’s app registration

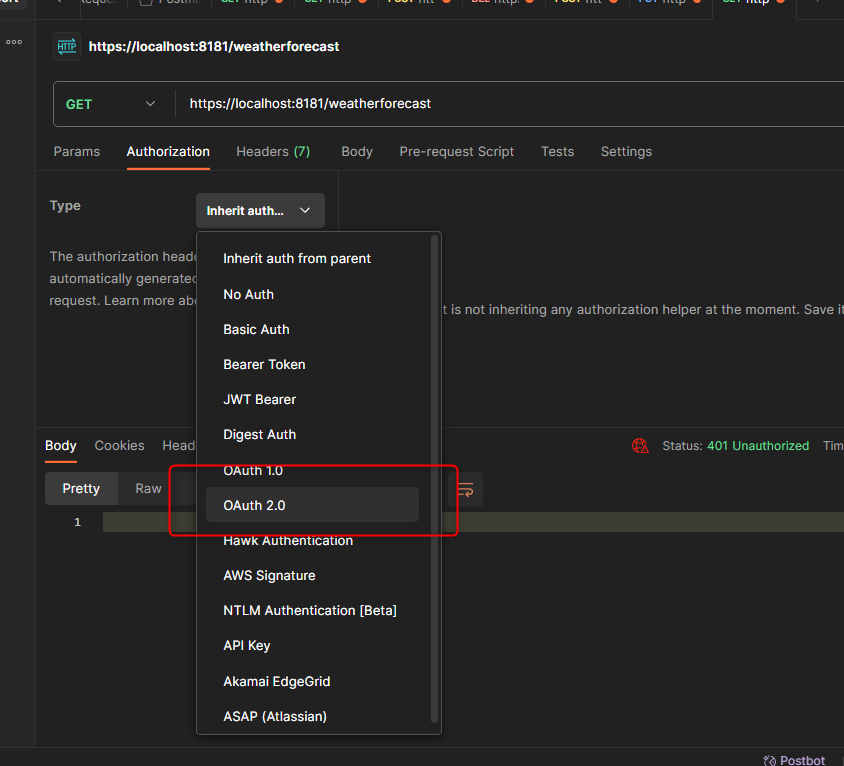
The next step is to go the our previous Postman, in the Authorization section, choose the OAuth 2.0 type.
Now, fill the information in the section below:
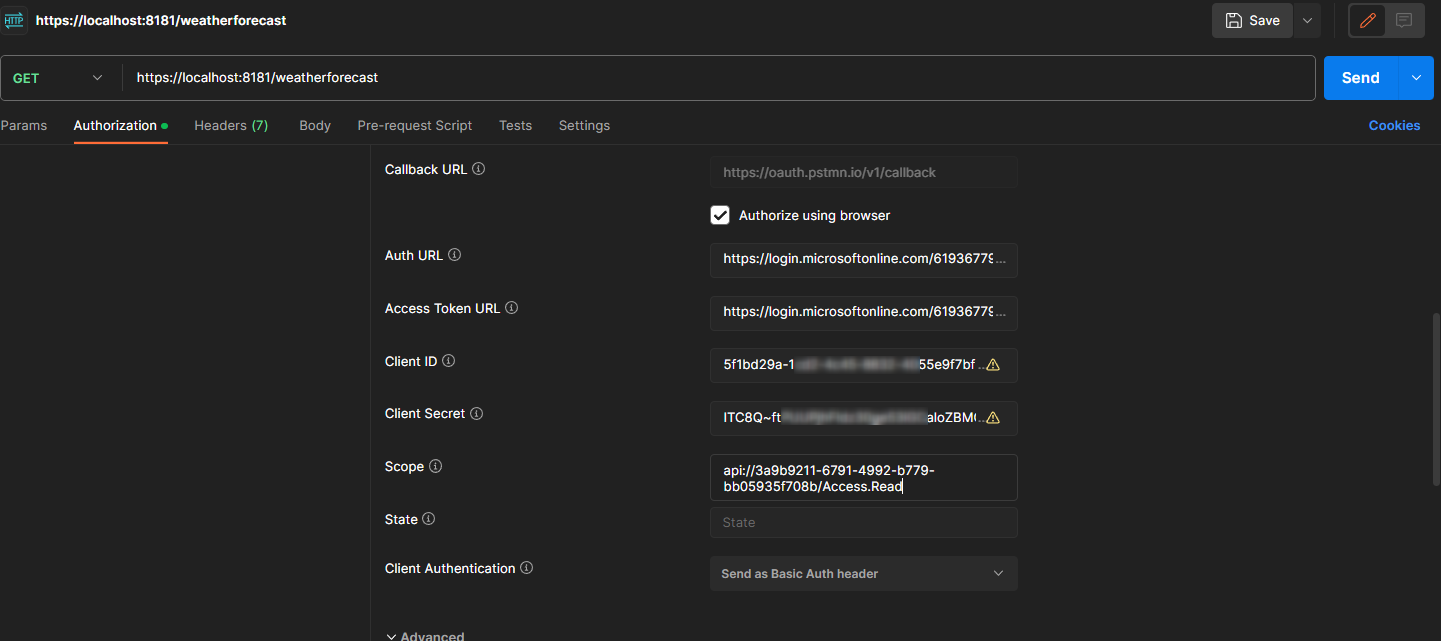
- Auth Url -> Authorization endpoint of api's app registration.
- Access Token URL -> Token endpoint of api's app registration.
- Client ID -> client id of our Postman
- Client Secret -> client secret of our postman
- Scope -> scope of the api - api://(GUID)/Access.Read
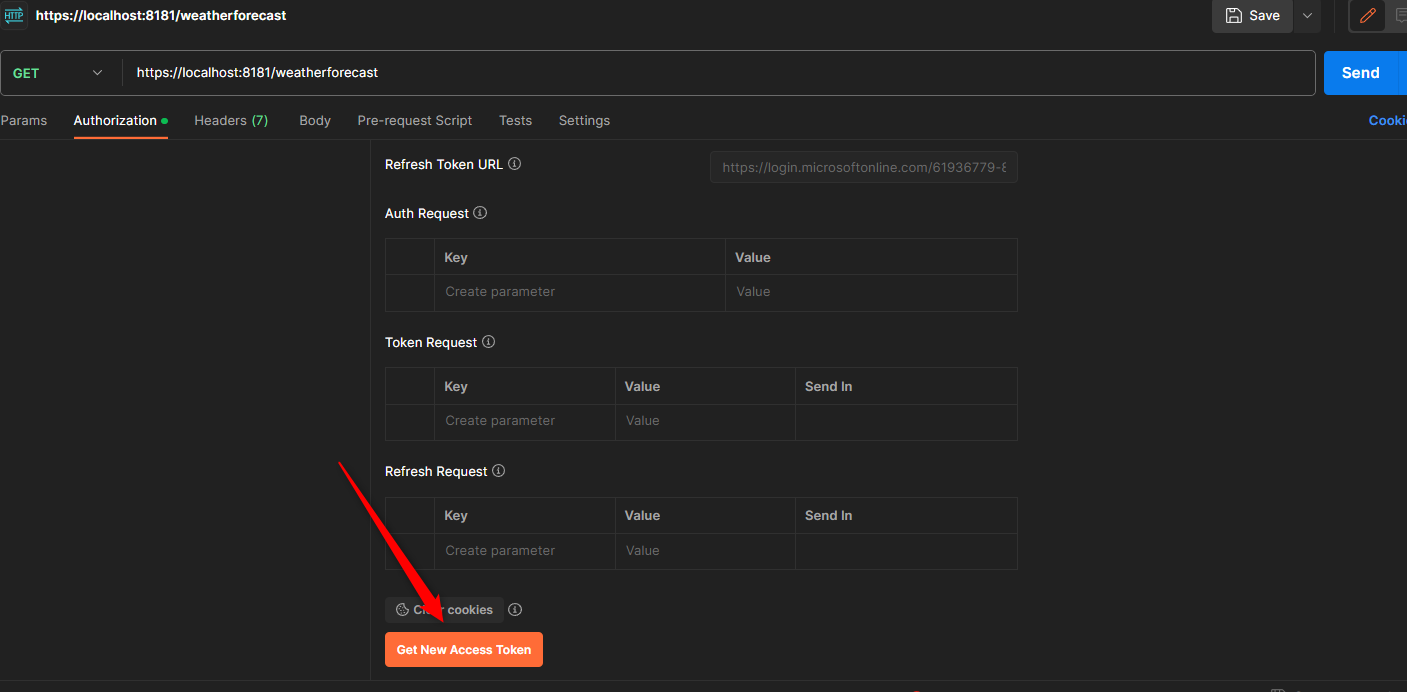
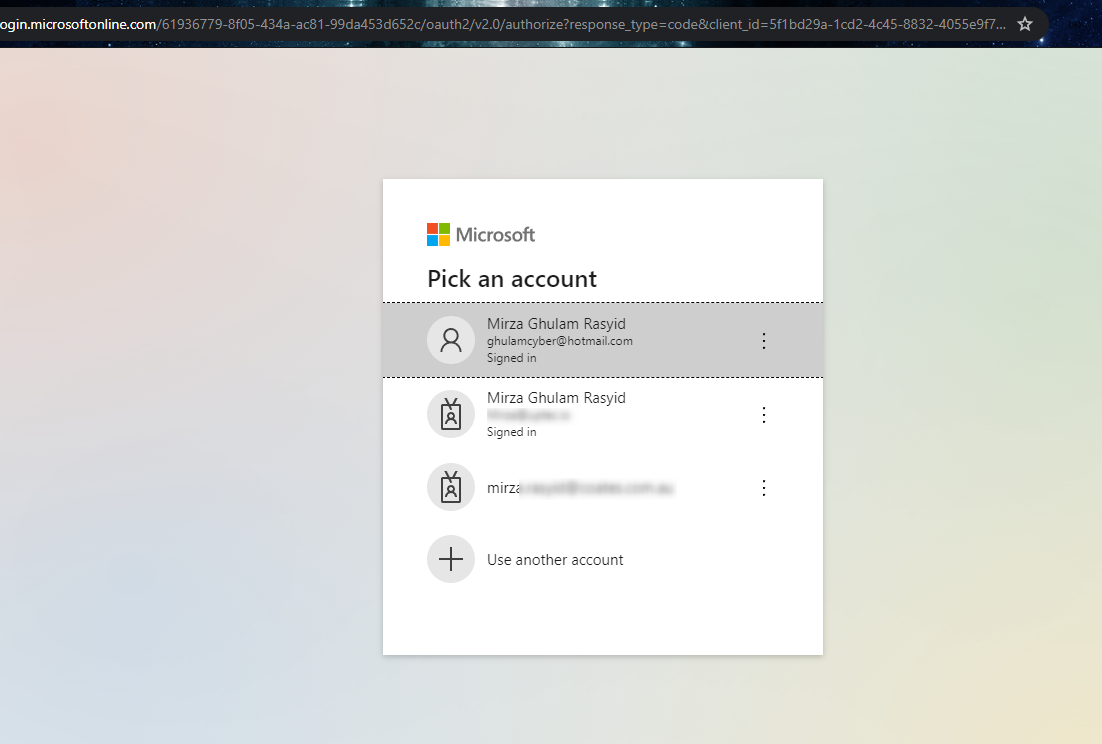
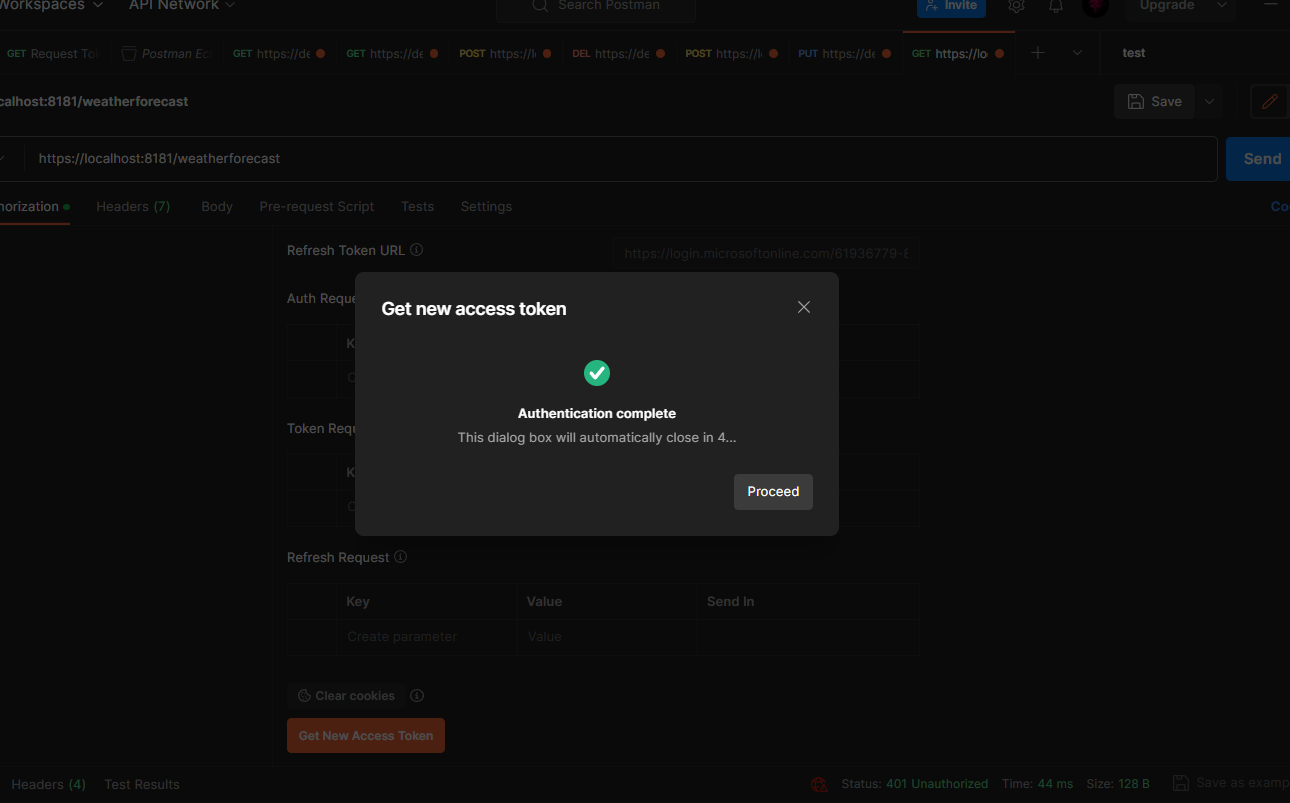
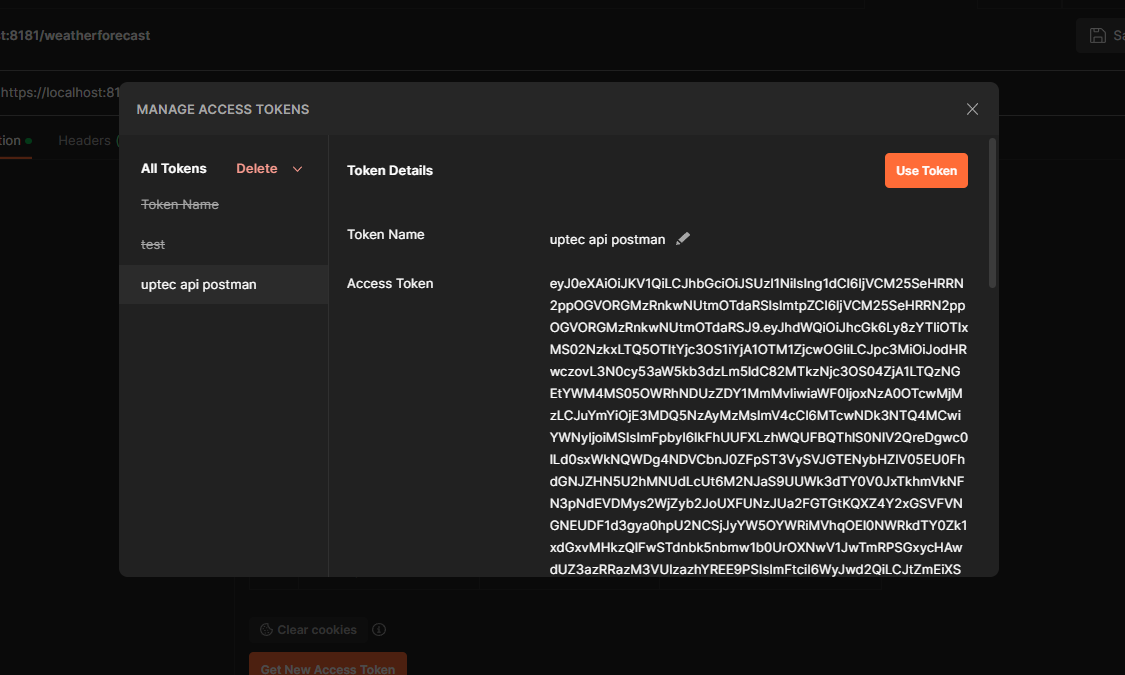
After that, scroll down and click the Get New Access Token. It will authenticate using browser. And on the successful sign-in, make sure you proceed and click Use Token button.
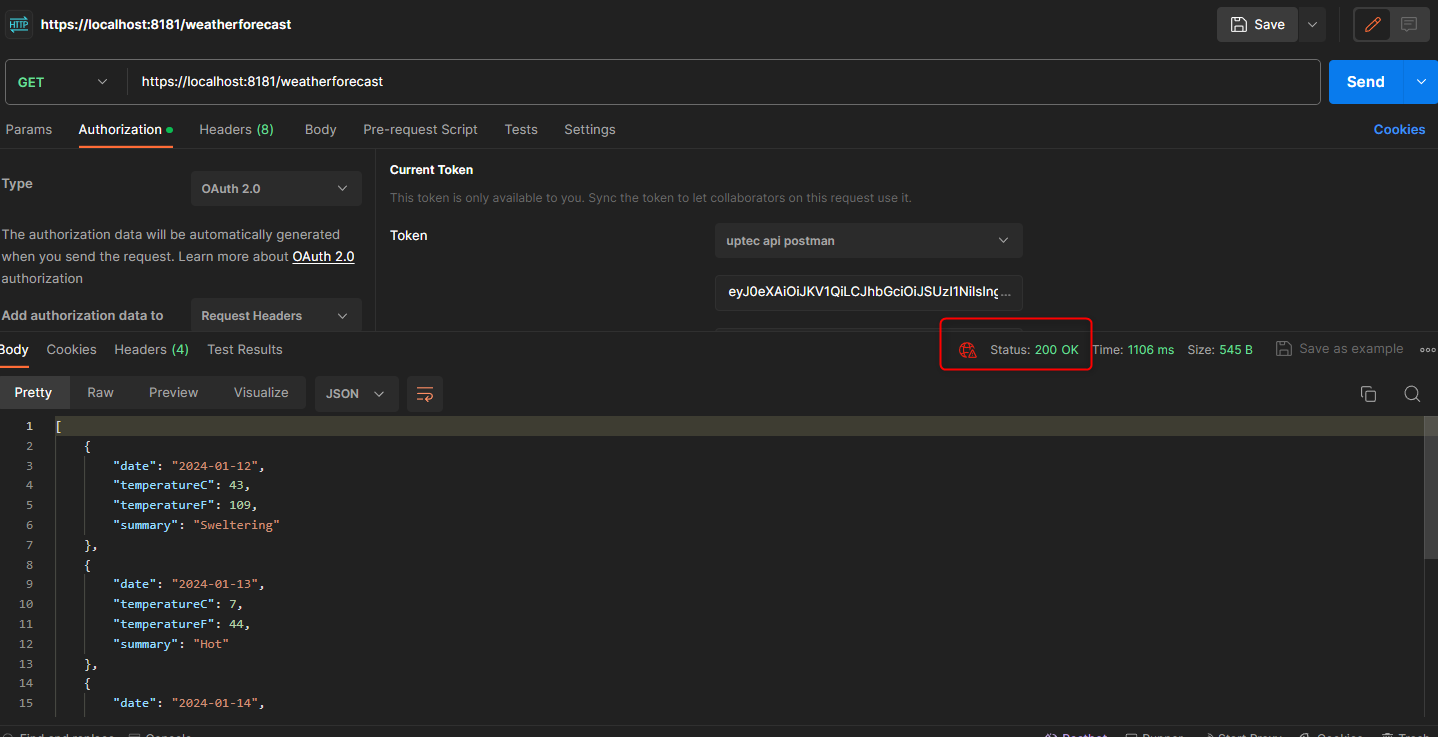
Ok, if no issues, we can now test to call our api endpoint.
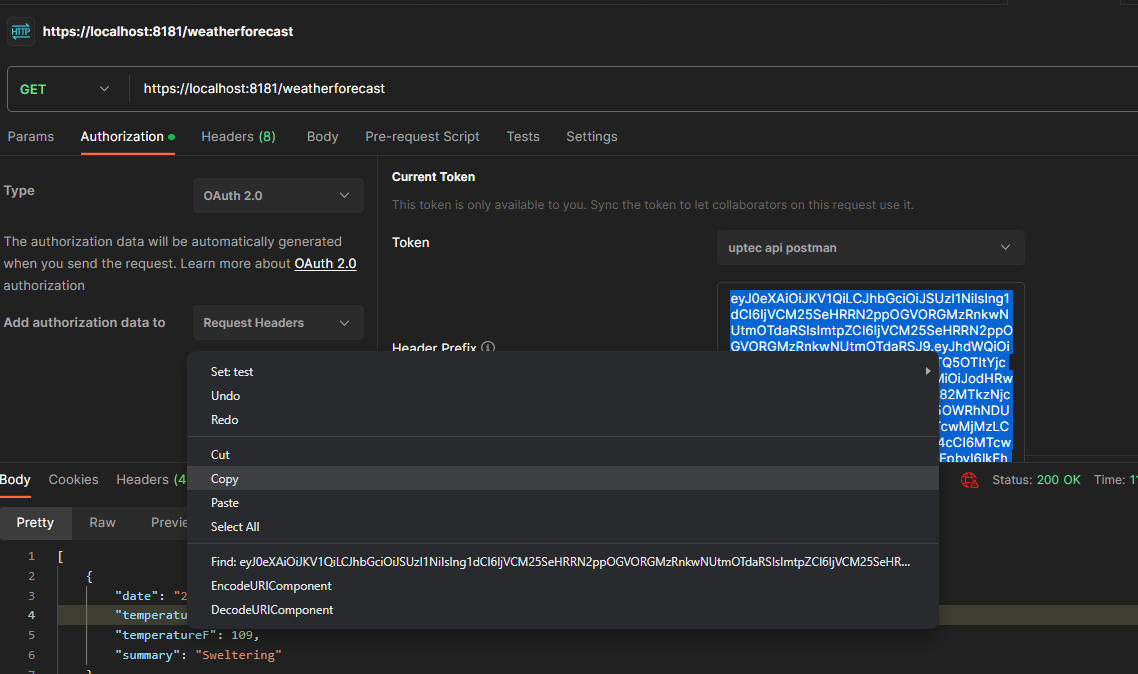
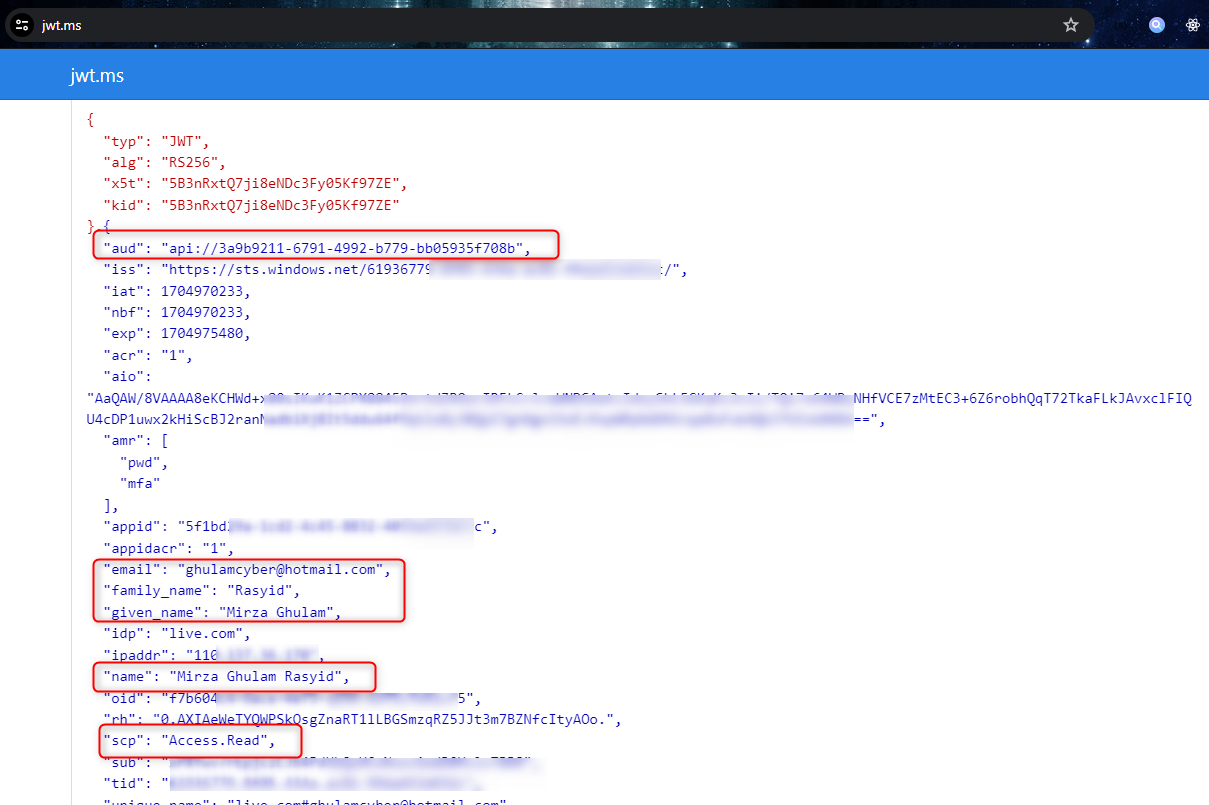
We can also copy paste our access token in the https://jwt.ms to inspect the payload information of it.
In the next tutorial, we will be accessing our protected api via console application built on top of .NET Core 7x.
Sample project: https://github.com/mirzaevolution/Uptec-Protected-Web-Api
Regards,
Mirza Ghulam Rasyid
3 min read
Auth Series #6 - Secure Open API (Swagger) calls with Microsoft Entra ID/Azure AD This is the 6th tutorial of the Auth Series. Previously in the...
4 min read
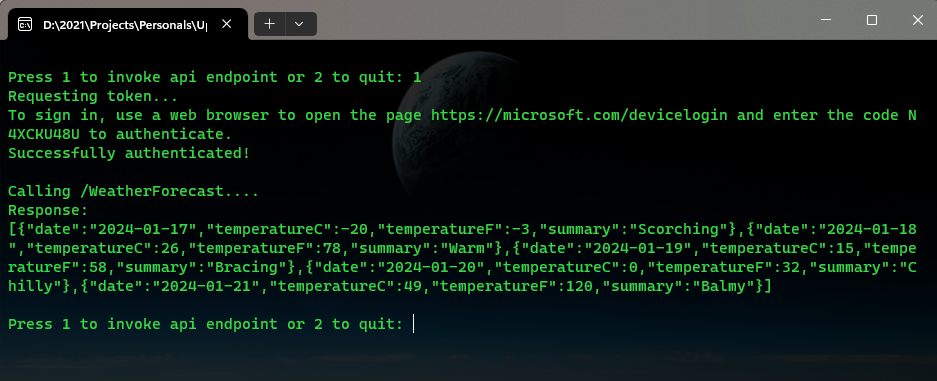
Auth Series #4 - Call ASP.NET Core API Protected By Azure AD/Microsoft Entra ID via Console App Using Device Code Flow This is the 4th tutorial of...

9 min read
Auth Series #5 - Call Microsoft Entra ID/Azure AD Protected Web API via ASP.NET Core MVC using Authorization Code Flow This is the 5th tutorial...