3 min read

Auth Series #3 - Call ASP.NET Core API Protected by Azure AD/Microsoft Entra ID via Console Client Credentials Flow

Auth Series #3 - Call ASP.NET Core API Protected by Azure AD/Microsoft Entra ID via Console Client Credentials Flow

Auth Series #3 - Call ASP.NET Core API Protected by Azure AD/Microsoft Entra ID via Console Client Credentials Flow

This is the 3rd tutorial of the Auth Series.

Before proceeding with this tutorial, make sure you follow the 2nd tutorial here: Auth Series #2 - Protect ASP.NET Core Api with Microsoft Entra ID and Access It via Postman as we will create a new console application to call our previous protected WeatherForecast endpoint.

We’re going to use Client Credentials Flow (Machine to Machine communication). Thus, no user login is involved in this demo.

Requirements:

- Framework: .NET Core 7x Console Project
- Nuget: Microsoft.Identity.Client

1. Create Client Secret

2024 01 13 06H27 01

If you did follow our previous tutorial, you will have created two new app registrations:

- uptec-auth-api: This app registration used by our protected WeatherForecast api
- uptec-auth-api-caller: This app registration used by Postman to call the protected api

Now, we need to go to uptec-auth-api-caller app registration to generate a new client secret for our console application.

NB: If you don’t use the same name, make sure you go to your app registration for calling the api.

Go to the Secret Menu, and generate a new secret here. Once completed, take a note of the generated secret.

2024 01 13 06H34 09

2024 01 13 06H34 21

If you have created the client secret, don’t forget to re-capture the client id and tenant id of the uptec-auth-api-caller for later use in our app.

2024 01 13 06H27 31


2. Create Application Role for Client Credentials Flow

If you take a look on the previous tutorial for our WeatherForecast api, we used a scope named: Access.Read to be used by Postman.

Previously we used Client Credentials Flow. However now We use what we call an App Role. It is still the same mechanism like scope but used by applications that don’t require user interaction.

2024 01 13 06H36 34

Ok, go to uptec-auth-api’s app registration, and go to the App roles menu. In that page, Create a new app role as shown below.

2024 01 13 06H46 59

Once created, go to the Expose an API menu and copy the Application ID URI. This will be used in our console app later with the format of:

api://3a9b9211-6791-4992-b779-bb05935f708b/.default

2024 01 13 06H36 58


3. Request API Permission

In the 2nd step, we have created App Role for uptec-auth-api app registration. Now, we need to make sure the caller app/console app can request that properly. We need to go to uptec-auth-api-caller app registration and request that App Role permission.

Go to uptec-auth-api-caller app registration > API Permission > Add Permission > Search and select in the APIs my organization use.

2024 01 13 06H47 59

Once the api is selected, choose the Application permissions and tick the App role.

2024 01 13 06H48 14

Last step is to grant that permission. Hit the Grant admin consent for default directory’s button.

2024 01 13 06H48 29


4. Create The App

Now we need to create a simple .NET Console App. Follow the steps below.

2024 01 13 06H38 02

We used UptecClientCredentialsConsole as the name. You can name it anything you want.

2024 01 13 06H42 17

Once created, we can install the nuget package for Microsoft.Identity.Client. This library is MSAL (Microsoft Authentication Library) that we use to request a token so that it can be used to access our protected api.

2024 01 13 06H40 32


5. Implement The Code

In the Program.cs, add the following namespaces:

using Microsoft.Identity.Client;
using System.Net.Http.Headers;

2024 01 14 10H31 03

Add the following private members after that. Don’t forget to copy paste your Client Id, Client Secret, Tenant Id (as part of https://login.microsoftonline.com/TENANT_ID), Scopes info (the App Role we previously created) and the Local Web Api Address (WeatherForecast).

        #region Private Members
        private static readonly string _authority = "https://login.microsoftonline.com/TENANT_ID";
        private static readonly string _clientId = "CLIENT_ID";
        private static readonly string _clientSecret = "CLIENT_SECRET";
        private static readonly string[] _scopes =
        {
            "api://3a9b9211-6791-4992-b779-bb05935f708b/.default"
        };

        //web api base address
        private static readonly string _apiBaseAddress = "https://localhost:8181";
        private static string _accessToken = "";
        #endregion

2024 01 14 10H32 01

Now, we need to initialize the IConfidentialClientApplication. This instance used to request the token from Azure AD/Microsoft Entra ID.

        static async Task InitiateApp()
        {
            IConfidentialClientApplication app =
                ConfidentialClientApplicationBuilder.Create(_clientId)
                .WithClientSecret(_clientSecret)
                .WithAuthority(_authority)
                .Build();
            try
            {
                var result = await app.AcquireTokenForClient(_scopes).ExecuteAsync();
                if (result != null)
                {
                    _accessToken = result.AccessToken;
                    Console.WriteLine(_accessToken);
                }
            }
            catch (Exception ex)
            {
                Console.WriteLine(ex);
            }
        }

2024 01 14 10H32 52

Create the method to register HttpClient instance with base address of the api and also access token in the Authorization Header.

        static HttpClient GetHttpClient()
        {
            var client = new HttpClient
            {
                BaseAddress = new Uri(_apiBaseAddress)
            };
            client.DefaultRequestHeaders.Authorization =
                new AuthenticationHeaderValue("Bearer", _accessToken);
            return client;

        }

2024 01 14 10H33 19

Last method, we need to create method to invoke the api and print the result to console.

        static async Task InvokeApiEndpoint()
        {
            var client = GetHttpClient();
            string path = "/WeatherForecast";
            Console.WriteLine($"\nCalling {path}....");
            string response = await client.GetStringAsync(path);
            Console.WriteLine("Response:");
            Console.WriteLine(response);
        }

2024 01 14 10H33 30

Then, in the Main method, we need to call the InitializeApp and InvokeApiEndpoint methods.

        public static void Main(string[] args)
        {
            InitiateApp().Wait();
            InvokeApiEndpoint().Wait();
        }

2024 01 14 10H33 43


6. Test The Applications

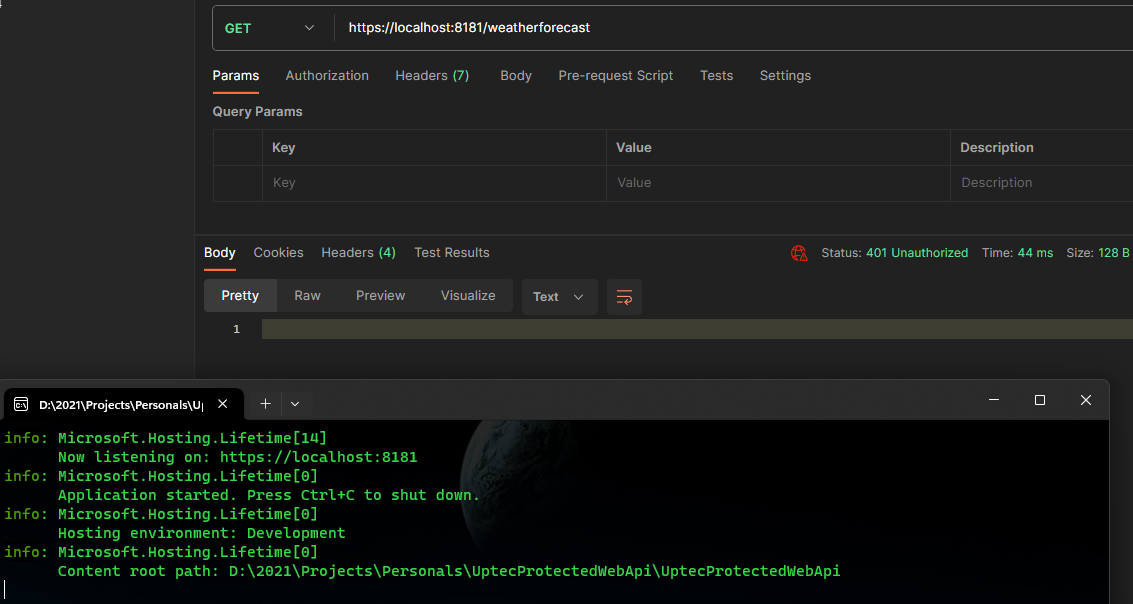
Make sure you run the previous WeatherForecast web api project in the 2nd tutorial first to test our console app.

2024 01 14 10H34 08

2024 01 14 10H34 45

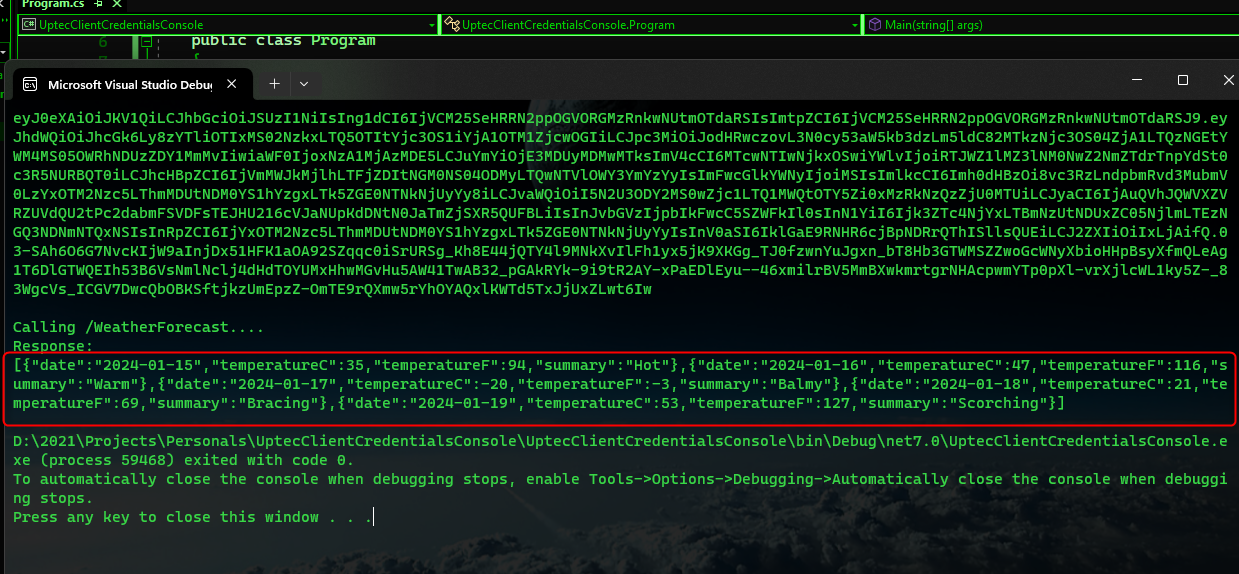
Now, we can run and test the console app.

2024 01 14 10H34 58

2024 01 14 10H35 32

Ok, we can see that we have successfully authorized to call the protected api. Let’s check our access token metadata via https://jwt.ms site.

2024 01 14 10H35 58

App Role that we defined earlier is there as an array of string.

Actually, this key value data we can use to add additional step as an authorization process in the Protected Api part to improve security.

Sample project: https://github.com/mirzaevolution/Uptec-Call-Protected-Api-Client-Credentials

Regards,

Mirza Ghulam Rasyid

Auth Series #4 - Call ASP.NET Core API Protected By Azure AD/Microsoft Entra ID via Console App Using Device Code Flow

4 min read

Auth Series #4 - Call ASP.NET Core API Protected By Azure AD/Microsoft Entra ID via Console App Using Device Code Flow

Auth Series #4 - Call ASP.NET Core API Protected By Azure AD/Microsoft Entra ID via Console App Using Device Code Flow This is the 4th tutorial of...

Read More
Auth Series #5 - Call Microsoft Entra ID/Azure AD Protected Web API via ASP.NET Core MVC using Authorization Code Flow

9 min read

Auth Series #5 - Call Microsoft Entra ID/Azure AD Protected Web API via ASP.NET Core MVC using Authorization Code Flow

Auth Series #5 - Call Microsoft Entra ID/Azure AD Protected Web API via ASP.NET Core MVC using Authorization Code Flow This is the 5th tutorial...

Read More
Auth Series #6 - Secure Open API (Swagger) calls with Microsoft Entra ID/Azure AD

3 min read

Auth Series #6 - Secure Open API (Swagger) calls with Microsoft Entra ID/Azure AD

Auth Series #6 - Secure Open API (Swagger) calls with Microsoft Entra ID/Azure AD This is the 6th tutorial of the Auth Series. Previously in the...

Read More